How to Split Photos Like a Pro with IDPhotoDIY’s Free Image Splitter
Last Update: February 1, 2026
If you love a clean, creative Instagram feed, you’ve probably admired those perfectly aligned 3×3 grids or seamless swipeable panoramas. Good news! You don’t need Photoshop or a paid app to make them. IDPhotoDIY’s Image Splitter does it all in seconds, right in your browser.
What Is the IDPhotoDIY Image Splitter?
The Image Splitter is a free online tool that divides any photo into smaller parts for Instagram grids or carousels. You can upload JPEG, PNG, WEBP, HEIC, or GIF files and choose how many rows and columns you want.
It includes presets for common layouts like 3×3 grids and carousels, or you can make your own custom split. Everything happens directly in your browser, no uploads, no account, and no watermark.
Why Creators Love It
This tool stands out for its speed, simplicity, and privacy. Once you upload your photo, you instantly see how it’s split. When you’re ready, you can download each piece separately or save them all together in one ZIP file.
Key benefits:
Free to use
- No watermark added
- Works on any device: desktop, phone, or tablet
- Privacy-friendly: photos never leave your device
- Fast and lightweight: browser-based processing
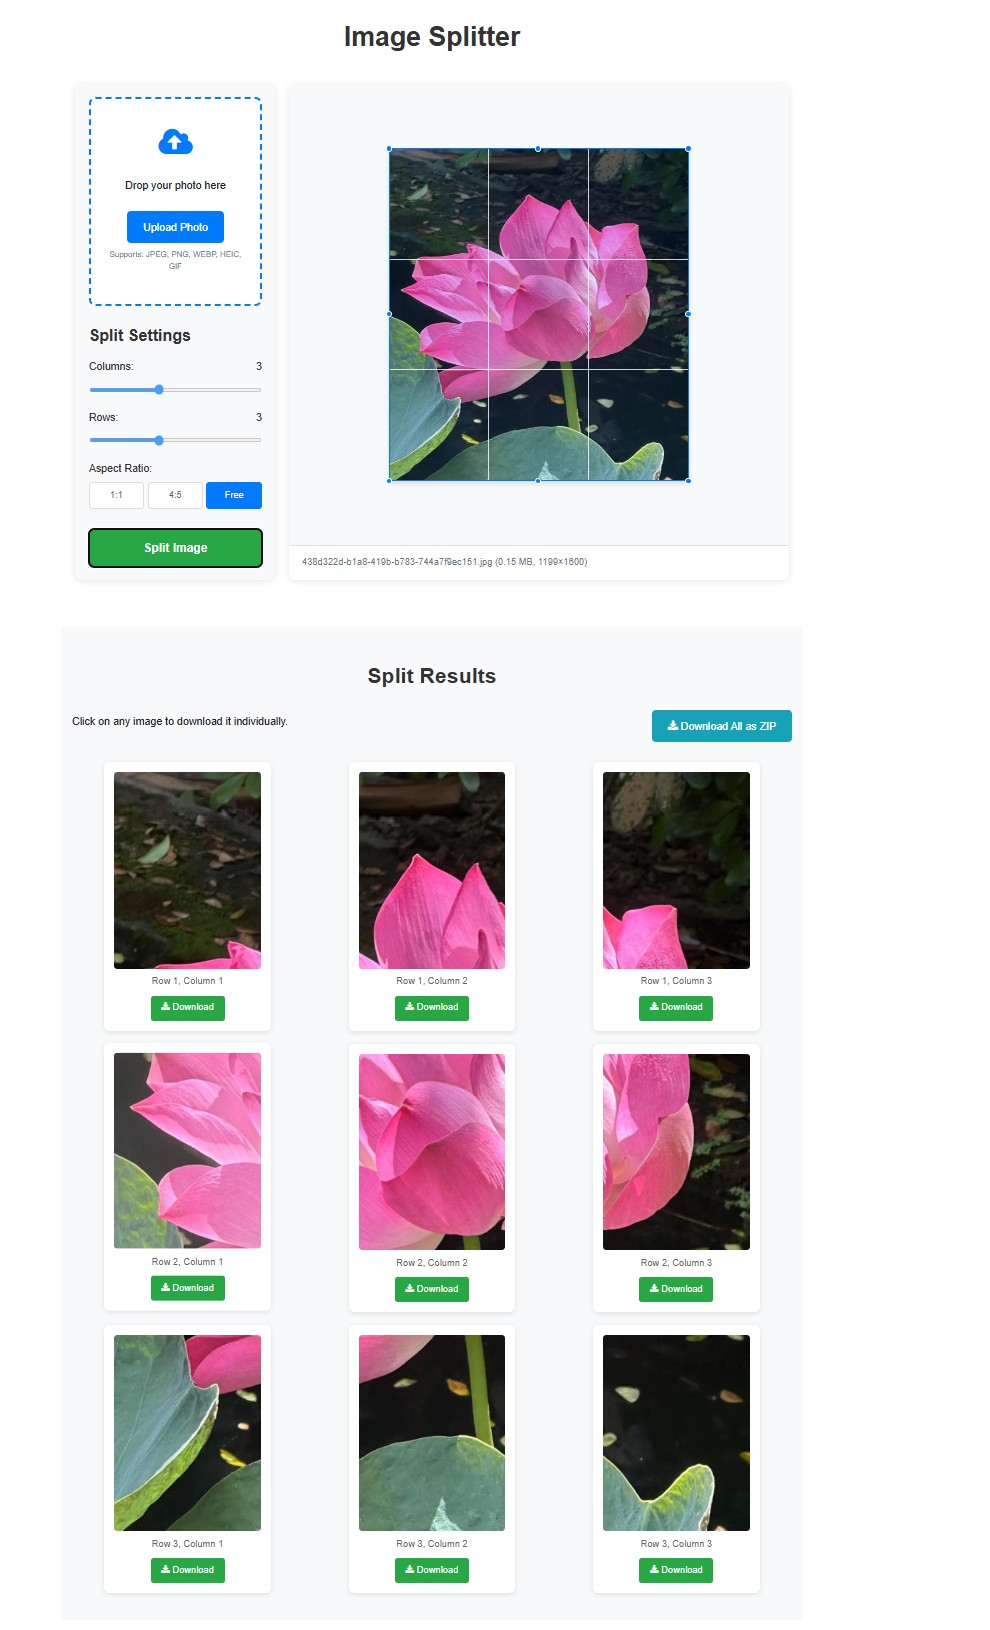
Step-by-Step Guide to Split Your Image
Step 1: Visit https://www.idphotodiy.com/tools/
Step 2: Upload the image you want to split.
Step 3: Select your grid or carousel layout,set aspect ratio and position your image
.jpg)
Step 4: Click "split image" and preview your split and download your images zip file.
Step 5: Upload them to Instagram in order to create your perfect grid.
Best Uses for the Image Splitter
Instagram grid art: Turn one photo into a 3×3 collage.
Carousel posts: Create panoramic swipe effects.
Brand storytelling: Showcase campaigns or product shots in sequence.
Photography portfolios: Present landscapes and wide shots creatively.
Explore More Free Photo Tools
IDPhotoDIY tools kit isn’t just about splitting images, it’s a full suite of free, browser-based photo editors. From resizing, enhancing, and converting to making passport or social media photos, every tool is built for speed, privacy, and ease of use. You can explore the complete collection at idphotodiy.com/tools/
and find the perfect one for your next project. The toolkit includes:
Photo Resizer – adjust photo dimensions instantly.
Image Compressor – reduce file size without losing quality.
Photo Cropper – crop images for any platform or ID format.
Image Converter – convert between formats (JPG, PNG, WEBP, HEIC, PDF).
Colorizer Tool – turn black-and-white photos into color.
Image Rotator and Flipper – correct orientation or mirror images.
Image Watermark tool – Add text or image watermarks to photos
Face Blur Tool – hide or pixelate faces for privacy.
Click here to make passport / visa photos