How to Properly Crop and Resize DV Lottery Photos

How idPhotoDIY works
Create your passport / visa photos online for printing and online submission

    (Requirements)
    (Requirements)
    (Requirements)
    (Requirements)
    (Requirements)
    (Requirements)
    (Requirements)
    (Requirements)


How it works

1. Take a picture

Use a white wall as background, take several photos with a camera or smartphone

2. Crop the photo

Crop your photo to the correct ID or passport size photo. Over 50 templates available!

3. Download and print

Download your photo and print it at any photo store or online. Single digital photo is also available.

How to Properly Crop and Resize DV Lottery Photos

f you’re planning to enter the DV Lottery, you probably know the photo is one of the trickiest parts. The U.S. State Department is extremely strict with photo requirements. A small mistake,like wrong dimensions, glare in glasses, or cropping the head too high can get your entry disqualified. Don’t worry though, I’ll walk you through how to crop and resize your DV Lottery photo the right way.

Why the Photo Matters

Think of the photo as your ticket in. The system automatically checks your image, and if it doesn’t meet the rules, it won’t even let your entry through. Even if it passes the upload, consular officers can still reject it later. Getting this right from the start saves you a lot of stress.

Official Photo Rules 

Here’s what the DV Lottery photo must look like:

  • Size: 600×600 pixels (minimum) and 1200×1200 pixels (maximum). Stick with 600×600 to be safe.
  • Format: JPEG only.
  • File size: Under 240 KB.
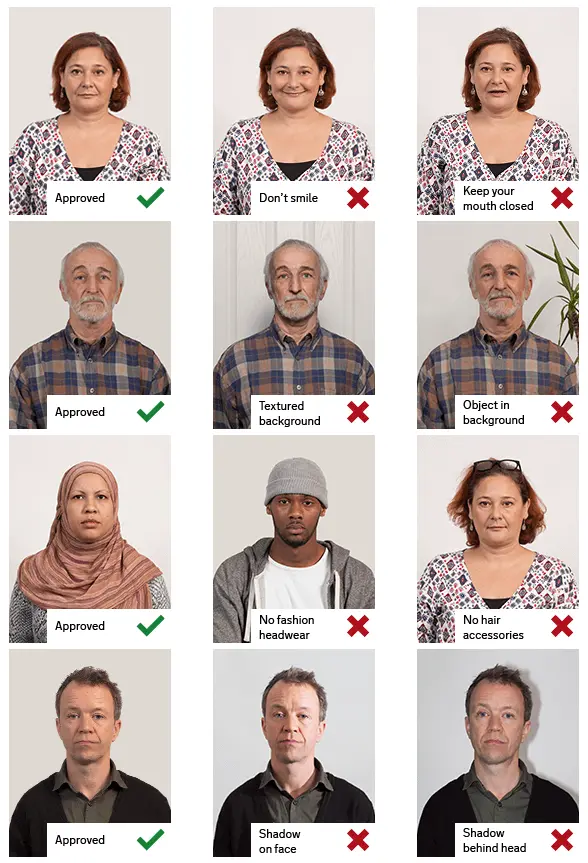
  • Background: Plain white or off-white. No patterns, no shadows.
  • Head size: From chin to top of hair should be 50–69% of the image height.
  • Eye level: Eyes must be 56–69% from the bottom of the photo.
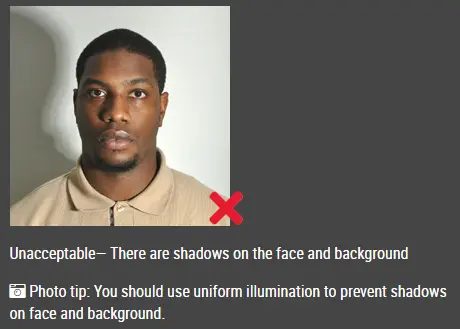
  • Lighting: Even, no harsh shadows, no glare.
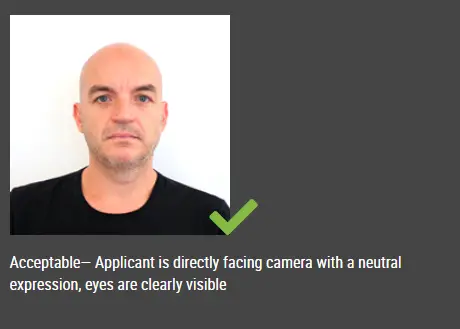
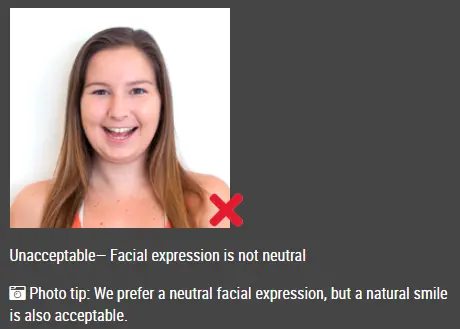
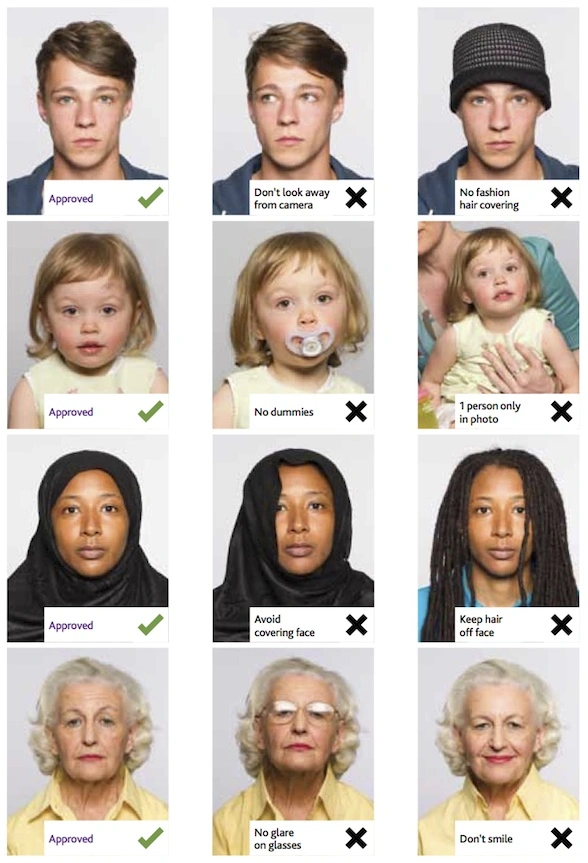
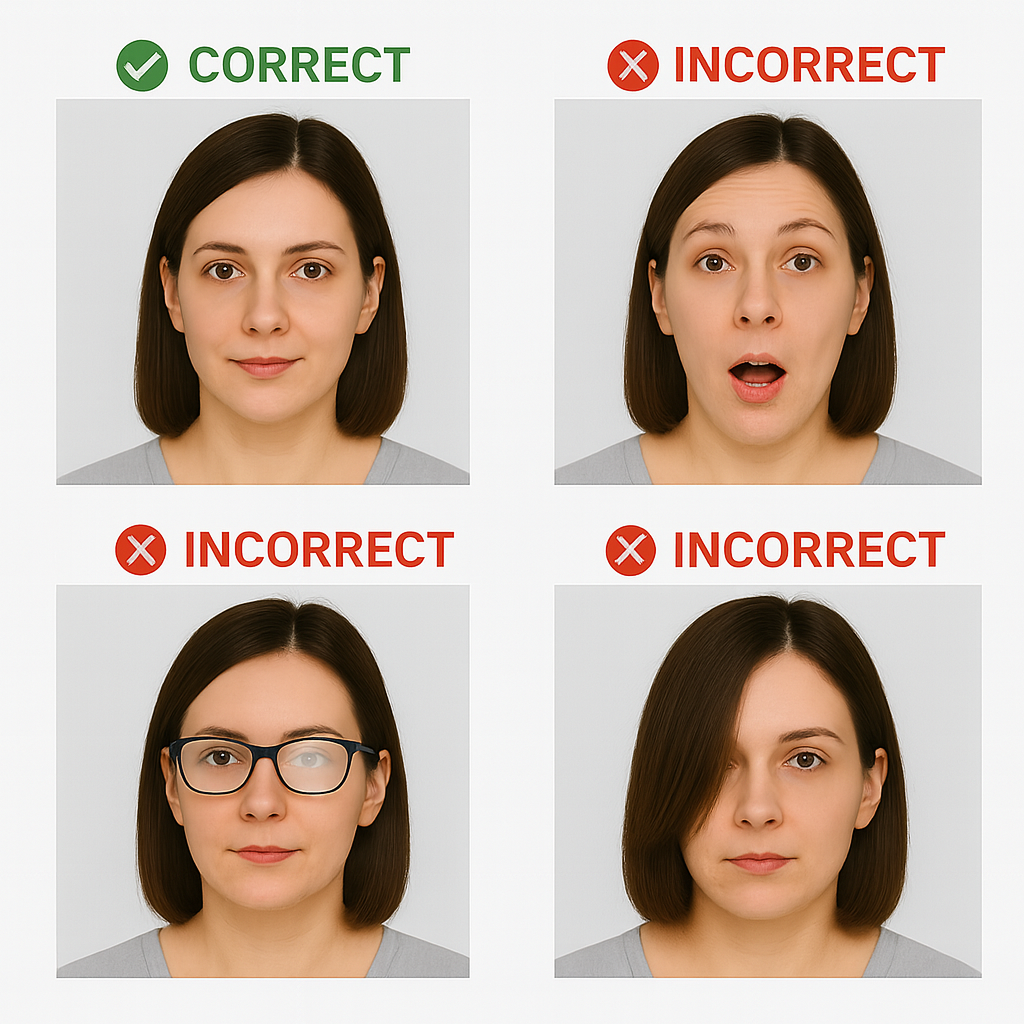
  • Expression: Neutral face, both eyes open, mouth closed.

Cropping the Photo

This is where most people mess up. Cropping isn’t just about cutting the picture into a square—it’s about fitting your head in the exact proportions.

Start with a larger photo taken in good light against a plain wall.

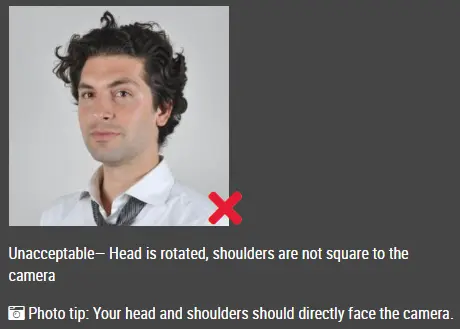
Center your face so it’s straight and not tilted.

Crop to a square—equal width and height.

Check head size: your face should take up about 2/3 of the photo, leaving a little space above your hair.

Resizing the Photo

Once cropped, resize it to 600×600 pixels. Most photo editors like Photoshop, GIMP, or idphotodiy can do this.

Export as JPEG.

Adjust the quality/compression so the file is under 240 KB.

Make sure the image still looks sharp (no blurriness or heavy pixelation).

Common Mistakes to Avoid

Open mouth or smiling → only neutral expressions are allowed.

Glasses glare → better to remove glasses altogether.

Hair covering eyes → your face must be clearly visible.

Selfie shots → perspective is wrong, use a proper camera or have someone else take it.

Busy backgrounds → keep it plain white.

DV lottery photo common mistakes

Final Check

Before uploading, double-check:

File is 600×600 pixels.

Less than 240 KB.

Head and eyes are in the correct ranges.

Background is plain white.

If everything matches, you’re good to go!

Other articles about DV lottery photo:


Click here to make passport / visa photos

Other passport pictures guides

How to take passport photo in 5 steps?


Step 1: Use a digital camera or a smartphone to take a photo

Find someone to take the photo for you and selfie photo is not acceptable for passport photo application. If you have a tripod, use it. A tripod will make it easier to keep the camera steady and level. The distance of the person to the camera should be around 1 meter.


Step 2: Find a venue with good lighting

When taking photo, you should face the light, such as a nice bright window or the door. This can provide even lighting to avoid shadows on the face and background. The face must be evenly lit. There should be no shadows and glares on the face.

Note: No need to worry about the background as our online passport photo generator will automatically remove or change the background for you.

unacceptable passport photo


Step 3: Wear properly for your passport photo

Do not wear uniforms. Wear regular street clothes in your photo.

Do not wear eyeglasses. If you wear glasses, sunglasses, or tinted glasses, take them off for your passport photo.

Your face must still be fully visible.  Don’t let your hair drape over your face and obscure your eyes. If you have very long bangs that cover your eyebrows, you should pin them back with bobby pins. It’s best if your ears show, as well, but that won’t cause your photo to be rejected.

No hats are allowed in passport photos unless it is religious headgear such as a headscarf or yarmulke that you wear every day.

acceptable passport photo

Step 4: Pose for a passport

Look straight towards the camera with face straight on. Head should not be tilted or rotated.

Both ears showing or both edges of the face visible if hair covers the ears.

Shoulders should be visible, and there should be enough space around the head for cropping the photo.

Position the camera in the same height as the head.

unacceptable passport photo

unacceptable passport photo


Step 5: Have a neutral facial expression

You can smile in your passport photos, but the government prefers that you have a neutral facial expression.

Smiling or having your mouth open is usually not acceptable, especially under the new international passport rules.

acceptable passport photo

Unacceptable passport photo


Good and bad passport photo examples

Example of passport photos

Printed passport photos

Online Passport Photo Generator

Is this document useful?