How To Take a Passport Photo With iPhone

How idPhotoDIY works
Create your passport / visa photos online for printing and online submission


How it works

1. Take a picture

Use a white wall as background, take several photos with a camera or smartphone

2. Crop the photo

Crop your photo to the correct ID or passport size photo. Over 50 templates available!

3. Download and print

Download your photo and print it at any photo store or online. Single digital photo is also available.

An iPhone can be used to take a passport photo, but preparation and attention to details are essential for the photo to meet Passport Photo Requirements. The article is to guide you to taking a passport photo with your iPhone.  

Prepare

To make a perfect passport photo, you need to make the following preparations:

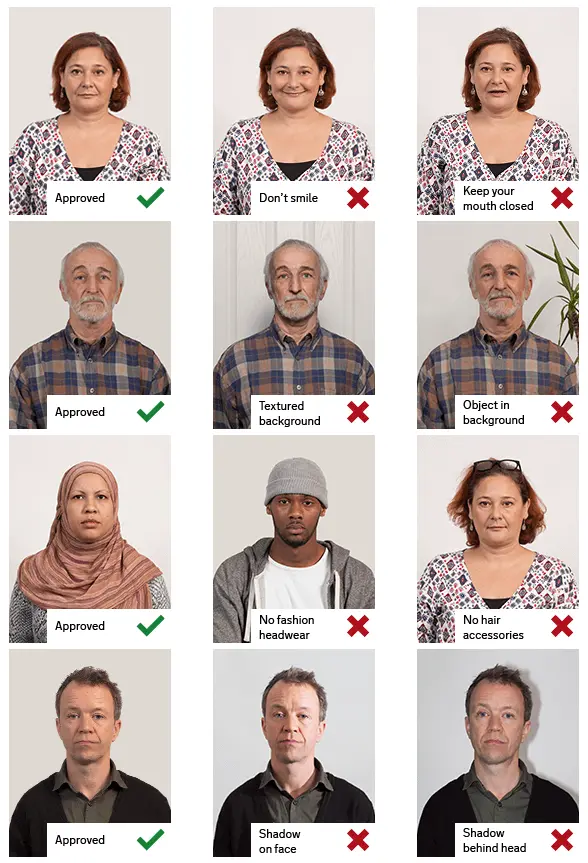
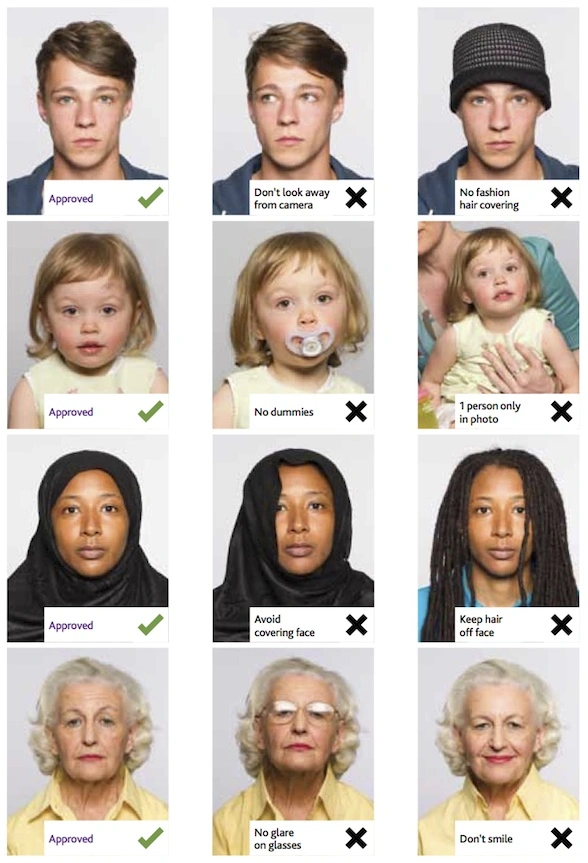
  • Be sure to keep the passport photo requirements in mind

  • iPhone 5 or newer is recommended 

  • If you don't have a tripod, ask a friend for help as no selfies are allowed.

  • Choose a well-lit place (You do not have to worry about the background as our passport photo tool will remove the background automatically)
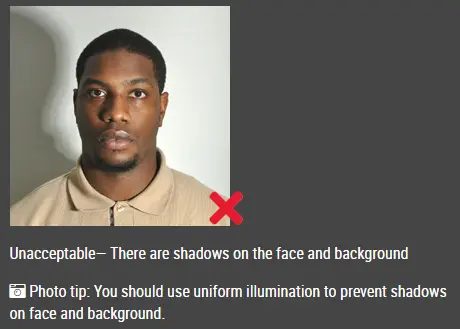
    • Standing directly under a light source is not recommended as it can create glare and shadows.
    • Do not take the photo outdoors in strong sunlight as that will make you squint.

    • Ideally, your light source should be behind and above your photographer.
  • Attire: wear clothing normally worn on a daily basis 
    • Clothes should be contrast clearly with the background so that it won't be blend in with the background
    • It is best to choose dark dark clothes that clearly contrast with background
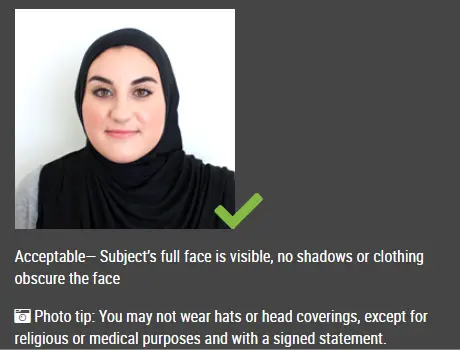
    • No hats or scarfs (except for religious and medical reasons)
    • You cannot wear a uniform.
  • You can put on light makeup if you want to,but you must make sure that you look natural

Take the photo

When you get the above ready, then you can take your photo. When taking your photo, the followings should be paid attention to:

  • Stand 0.5 metres away from your background to reduce shadows

  • To keep your facial features in focus, the photographer or the tripod should stand 1.5 metres away from you.
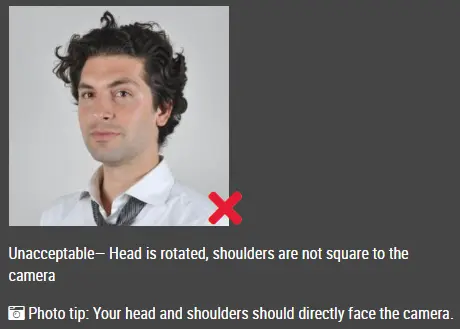
  • It is important that the photographer or the tripod holds the camera at eye level to help you avoid tilting your head upward or downward.
  • Be sure to maintain a straight posture without tilting your head
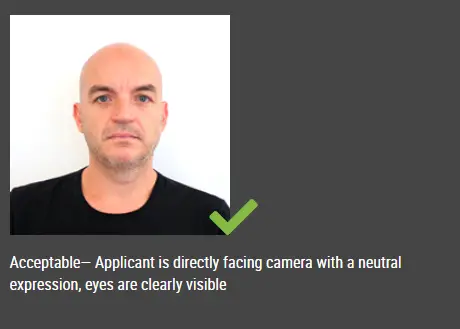
  • Open both of your eye
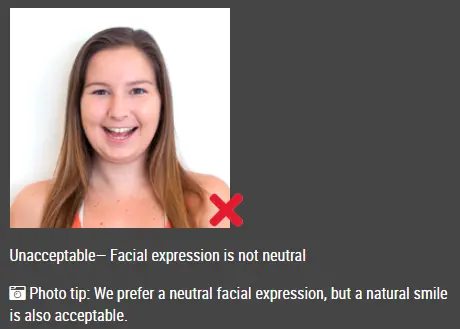
  • Do not show your teeth
  • You facial expression should be neutral.
  • Look directly at the lens and focus 
  • Capture a couple of photos so that you can have multiple photos to choose from

Edit your photo

After taking the picture, you can leave the passport photo editing to us. All you have to do is to select the best photo and then upload it to our website https://www.idphotodiy.com/. Choose the country, we will generate a qualified passport photo within seconds.

Print your photo

After downloading the digital photo for online submission and the printable 4X6 photo template from our website, you can now do the printing if you need a physical photo. If you have a color printer at home, you can print it at home. Otherwise, you may order your photo online or print it in the store at CVS, Walgreens or Walmart


Click here to make passport / visa photos

Other passport pictures guides

How to take passport photo in 5 steps?


Step 1: Use a digital camera or a smartphone to take a photo

Find someone to take the photo for you and selfie photo is not acceptable for passport photo application. If you have a tripod, use it. A tripod will make it easier to keep the camera steady and level. The distance of the person to the camera should be around 1 meter.


Step 2: Find a venue with good lighting

When taking photo, you should face the light, such as a nice bright window or the door. This can provide even lighting to avoid shadows on the face and background. The face must be evenly lit. There should be no shadows and glares on the face.

Note: No need to worry about the background as our online passport photo generator will automatically remove or change the background for you.

unacceptable passport photo


Step 3: Wear properly for your passport photo

Do not wear uniforms. Wear regular street clothes in your photo.

Do not wear eyeglasses. If you wear glasses, sunglasses, or tinted glasses, take them off for your passport photo.

Your face must still be fully visible.  Don’t let your hair drape over your face and obscure your eyes. If you have very long bangs that cover your eyebrows, you should pin them back with bobby pins. It’s best if your ears show, as well, but that won’t cause your photo to be rejected.

No hats are allowed in passport photos unless it is religious headgear such as a headscarf or yarmulke that you wear every day.

acceptable passport photo

Step 4: Pose for a passport

Look straight towards the camera with face straight on. Head should not be tilted or rotated.

Both ears showing or both edges of the face visible if hair covers the ears.

Shoulders should be visible, and there should be enough space around the head for cropping the photo.

Position the camera in the same height as the head.

unacceptable passport photo

unacceptable passport photo


Step 5: Have a neutral facial expression

You can smile in your passport photos, but the government prefers that you have a neutral facial expression.

Smiling or having your mouth open is usually not acceptable, especially under the new international passport rules.

acceptable passport photo

Unacceptable passport photo


Good and bad passport photo examples

Example of passport photos

Printed passport photos

Online Passport Photo Generator

Is this document useful?

This document is rated 5 / 5 - 1 Votes