2x2 Passport Photo Size
Last Update: February 23, 2026
The 2x2 passport photo size is one of the most commonly used dimensions for passport photos.It is measured in inches and is typically used for official documents such as passports, visas, and other identification cards.
The dimensions of a 2x2 passport photo size are 2 inches in width and 2 inches in height. Passport photos should be taken in accordance with the issuing authority's guidelines, such as the appropriate lighting, facial expression, and background color.
It is important to keep in mind that different countries may have specific requirements for passport photos, such as background color, face positioning, and other details.It's always a good idea to check with the relevant authority or the consulate of the country for which you need the passport or visa to ensure compliance with their specific photo guidelines.
For full official rules, see our complete guide to passport photo requirements.
While the 2x2 measurement remains constant, it is essential to be aware of the specific requirements when capturing or printing your passport photo. Here are some key specifications to keep in mind:
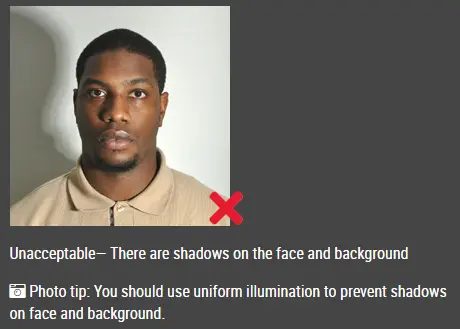
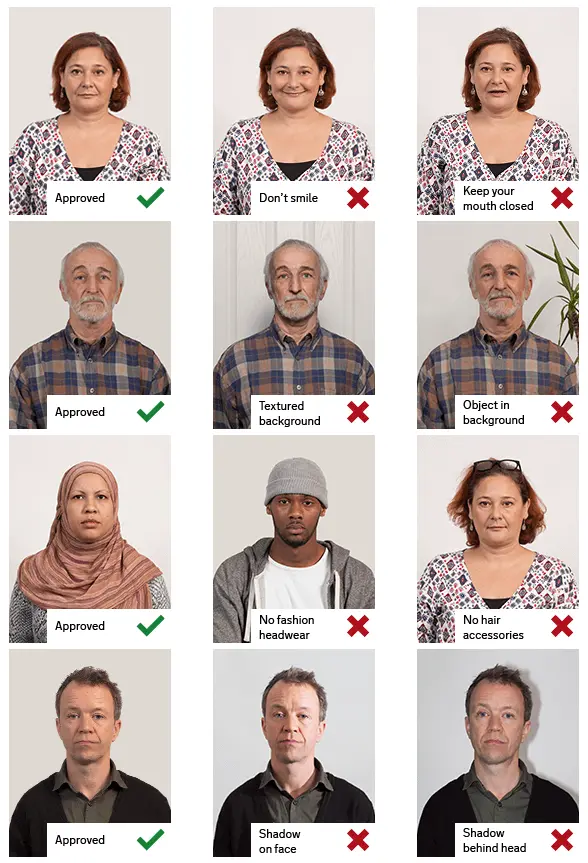
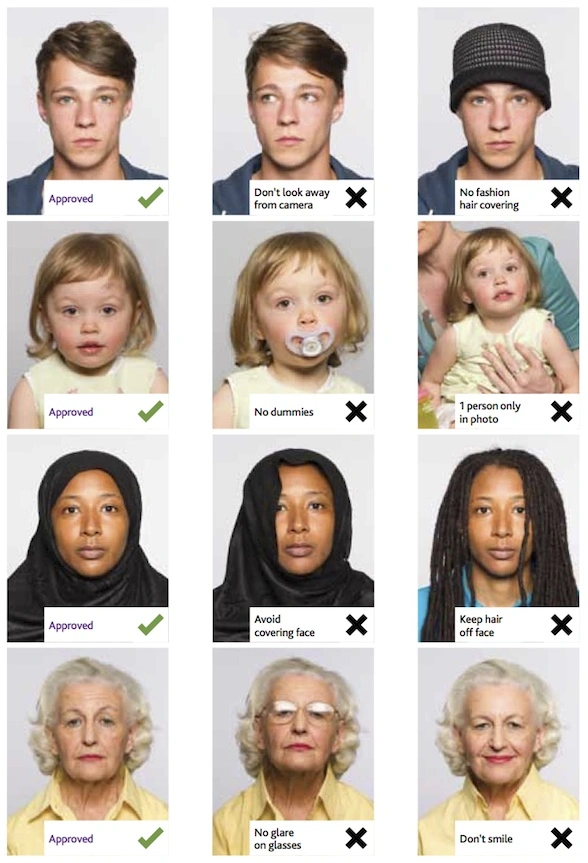
1. Background: The background of the photo should be plain white or off-white, ensuring there are no patterns, shadows, or objects behind the subject.
2. Lighting: The photo should be well-lit, with even lighting throughout the subject's face. Harsh shadows or bright glares should be avoided.
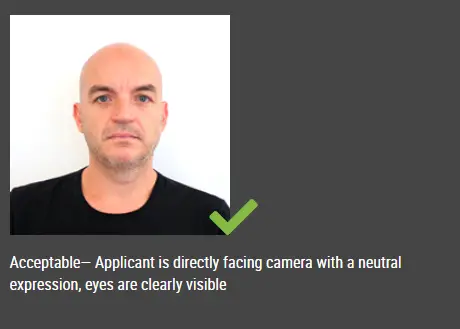
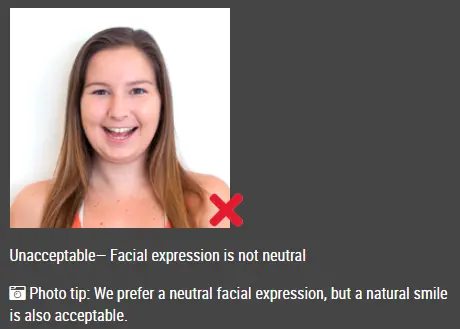
3. Facial Expression: The subject should have a neutral facial expression with both eyes open, looking directly into the camera. Smiling is generally discouraged, as it may interfere with facial recognition technology.
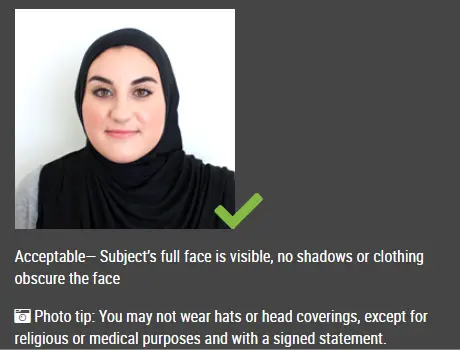
4. Clothing: It is advisable to wear everyday attire that contrasts with the background. Avoid wearing uniforms, hats, or any accessories that cover the face.
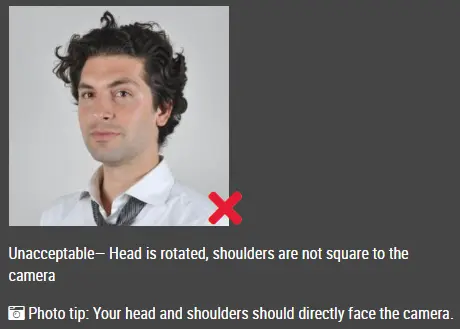
5. Head Position and Size: The subject's head should be centered within the photo, facing the camera directly. The head size, measured from the bottom of the chin to the top of the head, should be between 1 inch and 1 3/8 inches (between 25mm and 35mm).
6. Resolution and Print Quality: The photo should have a minimum resolution of 600 DPI (dots per inch) and be printed on high-quality photo paper. The image should be sharp, clear, and in color, with natural skin tones.
Tips for Taking Your Own Passport Photo:
Taking your own passport photo can be a cost-effective and convenient option. To ensure success, consider the following tips:
1. Use a Plain White Background: Hang a white or off-white sheet as a backdrop, ensuring it covers a large enough area to avoid any shadows or uneven lighting.
2. Camera Setup: Use a tripod or stabilize your camera to avoid any blurriness. Position the camera at eye level and ensure the subject is centered within the frame.
3. Proper Lighting: Utilize natural lighting or a combination of soft, diffused artificial light sources to achieve even lighting without harsh shadows.
4. Photo Editing: Use photo editing software to crop the image to the required 2x2 size and adjust the brightness, contrast, and color balance as per the specifications.
Click here to make passport / visa photos