What increases your chances of winning the DV lottery?

How idPhotoDIY works
Create your passport / visa photos online for printing and online submission

    (Requirements)
    (Requirements)
    (Requirements)
    (Requirements)
    (Requirements)
    (Requirements)
    (Requirements)
    (Requirements)


How it works

1. Take a picture

Use a white wall as background, take several photos with a camera or smartphone

2. Crop the photo

Crop your photo to the correct ID or passport size photo. Over 50 templates available!

3. Download and print

Download your photo and print it at any photo store or online. Single digital photo is also available.

What increases your chances of winning the DV lottery?

Winning the U.S. Diversity Visa (DV) Lottery, popularly called the Green Card Lottery, feels like hitting the jackpot. The draw is random, but a clean, error-free application can make all the difference between getting selected or disqualified. Here’s how to make sure your entry stays valid and your chances stay strong.

1. Apply Early

Every year, people rush to apply on the final day and get hit by slow servers or website crashes. Don’t be one of them. Submitting your entry early on the official site (dvprogram.state.gov) keeps you safe from technical errors and fake “lottery agent” sites.

2. Submit Only One Entry (Per Person)

You can’t outsmart the system - multiple entries mean automatic disqualification.
Pro tip: if you’re married, both you and your spouse can submit separate entries, listing each other as dependents. It doubles your household’s odds legally.

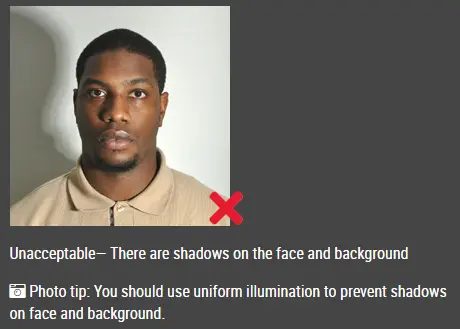
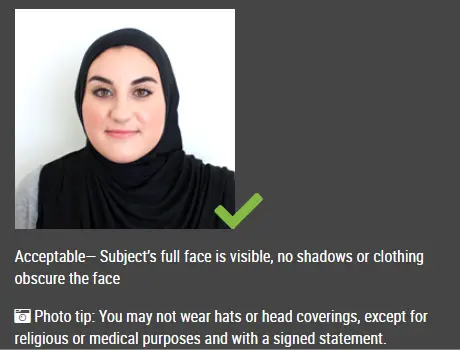
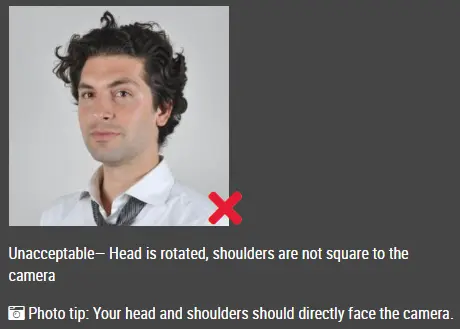
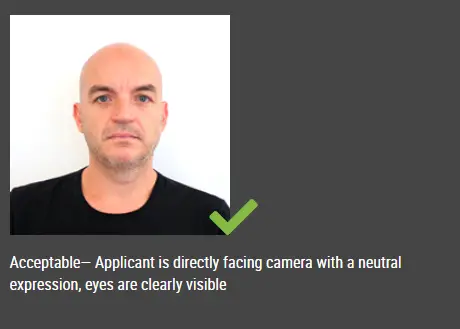
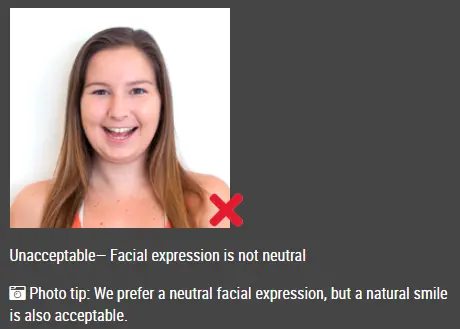
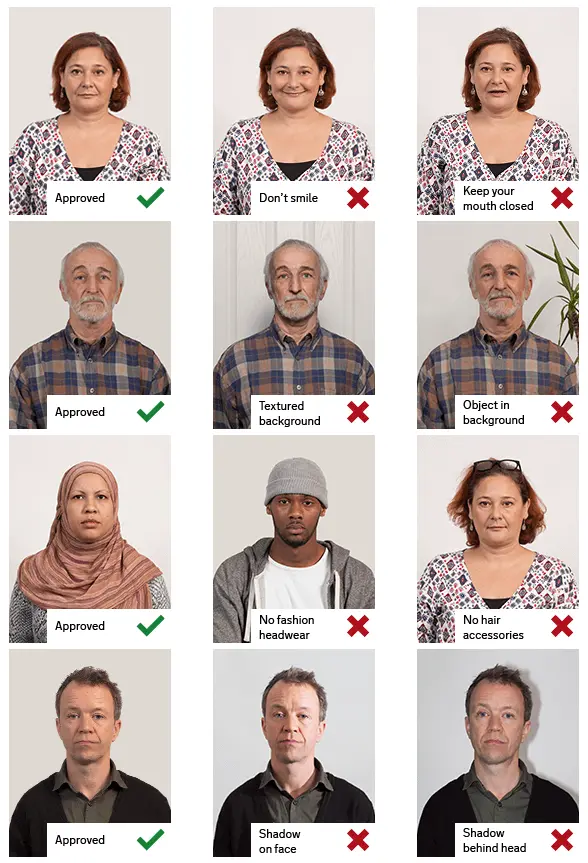
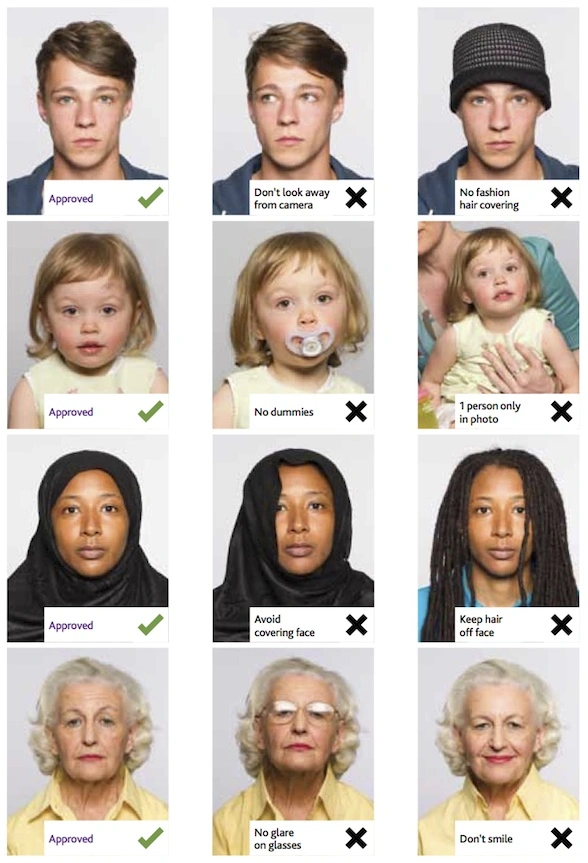
3. Get Your Photo Right

Bad photos are one of the top reasons entries get rejected. Follow the official photo rules:

  • Taken within the past six months
  • Plain white background
  • No glasses, hats, or filters

Use the free photo-checker on the DV website to confirm compliance.

4. Double-Check Every Detail

Before you click submit, review everything. Ensure your name, birth date, passport number, and country of birth exactly match your official documents. One typo can disqualify your application later.

5. Meet the Eligibility Requirements

To qualify, you need either:

A high school diploma or equivalent, or

Two years of work experience in a job that requires at least two years of training.

Check your occupation on the U.S. Department of Labor O*NET database if unsure.

6. Include All Family Members

Always list your spouse and unmarried children under 21, even if they don’t plan to move. Omitting anyone is treated as fraud and leads to automatic rejection.

7. Keep Your Confirmation Number Safe

After submitting, you’ll receive a confirmation number - your ticket to check results later. Save it securely (print, screenshot, or email it to yourself). If you lose it, you can’t access your results.

8. Prepare for the Interview Early

Winning doesn’t mean automatic approval. You’ll still go through a visa interview, medical exam, and document verification. Start collecting your key papers: birth certificates, diplomas, marriage records well before your appointment.

9. Keep Trying Every Year

Persistence matters. The more years you apply, the higher your cumulative odds of being selected. There’s no penalty for reapplying.


The DV Lottery may be luck-based, but preparation decides who stays eligible. Apply early, stay honest, and follow every rule carefully. Each correct submission keeps your dream of a U.S. green card alive.


Click here to make passport / visa photos

Other passport pictures guides

How to take passport photo in 5 steps?


Step 1: Use a digital camera or a smartphone to take a photo

Find someone to take the photo for you and selfie photo is not acceptable for passport photo application. If you have a tripod, use it. A tripod will make it easier to keep the camera steady and level. The distance of the person to the camera should be around 1 meter.


Step 2: Find a venue with good lighting

When taking photo, you should face the light, such as a nice bright window or the door. This can provide even lighting to avoid shadows on the face and background. The face must be evenly lit. There should be no shadows and glares on the face.

Note: No need to worry about the background as our online passport photo generator will automatically remove or change the background for you.

unacceptable passport photo


Step 3: Wear properly for your passport photo

Do not wear uniforms. Wear regular street clothes in your photo.

Do not wear eyeglasses. If you wear glasses, sunglasses, or tinted glasses, take them off for your passport photo.

Your face must still be fully visible.  Don’t let your hair drape over your face and obscure your eyes. If you have very long bangs that cover your eyebrows, you should pin them back with bobby pins. It’s best if your ears show, as well, but that won’t cause your photo to be rejected.

No hats are allowed in passport photos unless it is religious headgear such as a headscarf or yarmulke that you wear every day.

acceptable passport photo

Step 4: Pose for a passport

Look straight towards the camera with face straight on. Head should not be tilted or rotated.

Both ears showing or both edges of the face visible if hair covers the ears.

Shoulders should be visible, and there should be enough space around the head for cropping the photo.

Position the camera in the same height as the head.

unacceptable passport photo

unacceptable passport photo


Step 5: Have a neutral facial expression

You can smile in your passport photos, but the government prefers that you have a neutral facial expression.

Smiling or having your mouth open is usually not acceptable, especially under the new international passport rules.

acceptable passport photo

Unacceptable passport photo


Good and bad passport photo examples

Example of passport photos

Printed passport photos

Online Passport Photo Generator

Is this document useful?