Nigeria Visa Photo Maker
35x45 mm (3.5x4.5 cm) Size and Requirements


| Country | Nigeria |
| Document type | Visa |
| Passport picture size | Width: 35 mm, Height: 45 mm |
| Resolution (DPI) | 600 |
| Image definition parameters | Head must be between 70 to 80 % of the photograph from the bottom of the chin to the top of the head |
| Background color | White |
| Printable photo | Yes |
| Digital photo for online submission | Yes |
| Digital photo size | Width: 600 pixels , Height: 800 pixels |
| Photo Paper type | matte |
|
Detailed requirements Last Update: July 20, 2026 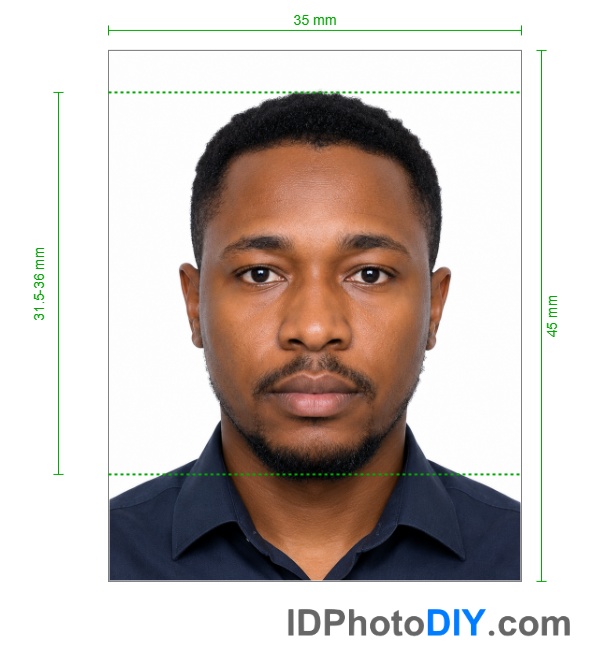 Nigeria Visa Photo Requirements For most applications, the standard format is a 35 × 45 mm printed photo or a 600 × 800 pixel digital image. That said, requirements can vary depending on where and how you apply, so it’s always worth double-checking the instructions provided by the embassy or visa centre handling your case. Nigeria Visa Photo SizeHere’s the typical format used:
Your face should take up most of the frame-roughly 70–80% of the image height. Avoid stretching or resizing the photo in a way that distorts your features. Printed vs Digital PhotosDepending on your application, you may need to upload a digital photo, submit printed copies, or both. Printed photosPrinted photos should be:
Avoid using regular printer paper unless it’s specifically allowed. Digital photosBefore uploading, check:
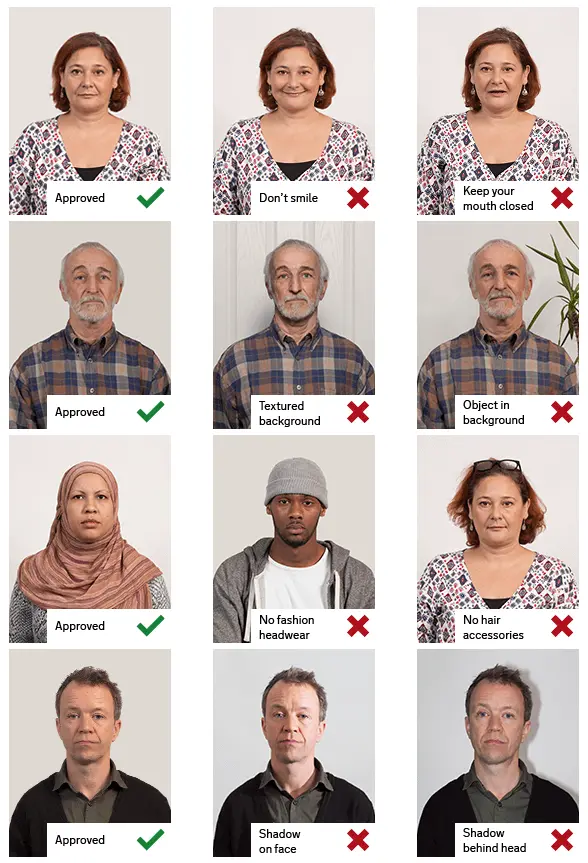
Background The background should be plain white and free from distractions. Avoid anything behind you such as:
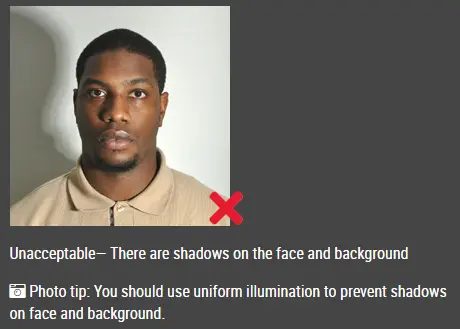
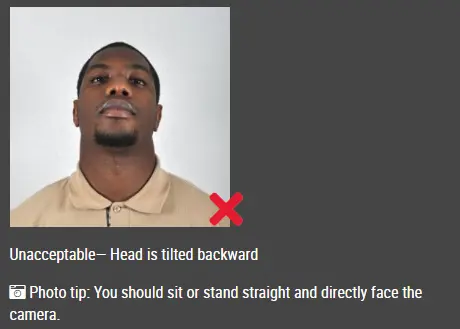
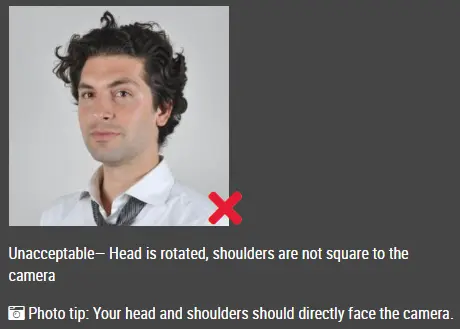
Standing a short distance away from the wall helps reduce shadows. If you’re using a white sheet, make sure it’s smooth and evenly lit. LightingGood lighting makes a big difference. Your face should be evenly lit, without harsh shadows or bright spots. Natural daylight works well, but avoid standing directly in front of a window. Overhead lighting can create shadows under your eyes or chin, so it’s better to have light coming from in front of you. Make sure the photo is sharp and in focus. Blurry or grainy images are often rejected. Face Position and FramingFace the camera directly with your head straight. The photo should include:
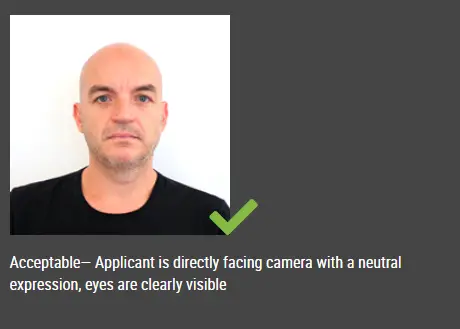
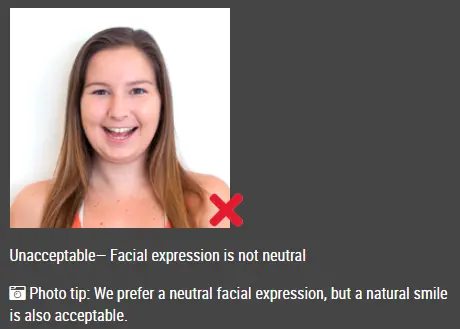
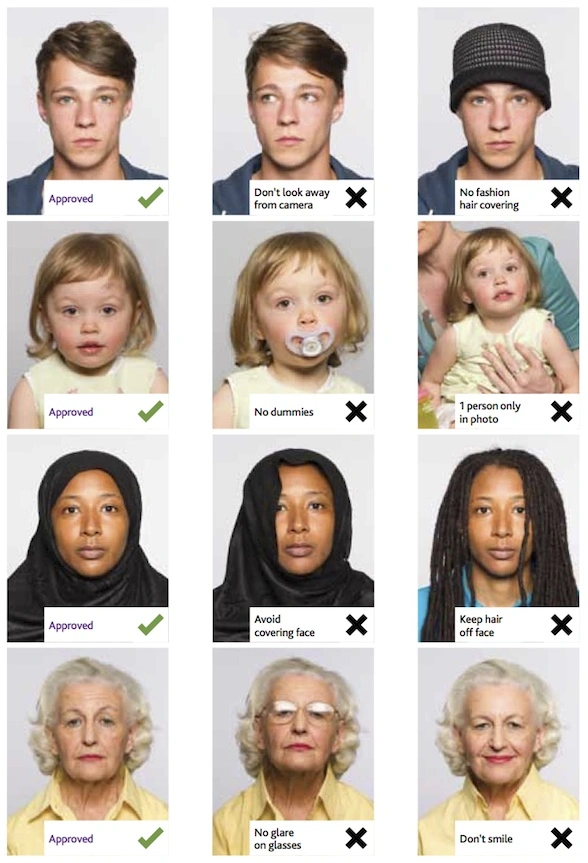
Avoid cropping too tightly or leaving too much empty space. The camera should be at eye level to keep proportions natural. ExpressionKeep your expression neutral. Look straight at the camera, keep your mouth closed and avoid smiling too broadly or making exaggerated expressions. HairYour hair shouldn’t cover your eyes or hide your face. If needed, move it behind your ears so your facial features are clearly visible. ClothingWear everyday clothing in a colour that contrasts with the white background. Dark or neutral colours usually work best. Avoid:
GlassesIt’s best to remove glasses if possible. They can cause glare or reflections that hide your eyes. If you must wear them:
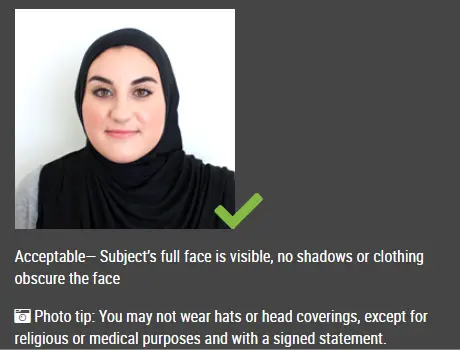
Sunglasses and tinted lenses are not allowed. Head CoveringsReligious or medical head coverings are allowed, as long as your face is fully visible and not shadowed. Hats or fashion accessories should be removed. Taking the Photo with a PhoneYou can take a visa photo with a smartphone if you’re careful. A few tips:
It’s better to have someone else take the photo or use a tripod instead of holding the phone yourself. Can You Use a Selfie?Selfies aren’t recommended. Holding the camera too close can distort your face and create an uneven angle. A properly positioned camera will give a more accurate result. Photos for Babies and ChildrenBabies and children need their own photos. For babies, you can lay them on a white sheet and take the photo from above. Make sure:
For young children, try to keep them facing the camera with a neutral expression. Take several shots and choose the best one. Common Reasons Photos Get RejectedPhotos are often rejected for simple reasons, such as:
Always check your photo carefully before submitting it. Upload IssuesIf your photo won’t upload, check:
If needed, try uploading from a different browser or device. Editing the BackgroundYou can use editing tools to change the background to white, but the original photo still needs to be clear and well-lit. Check the edges carefully after editing—sometimes parts of the hair or shoulders can be cut off. Avoid filters or edits that change your appearance. Using a Photo ToolOnline tools can help you crop and resize your photo correctly. Typically, you:
Even with a tool, it’s important to review the result before using it. Frequently Asked QuestionsWhat size should a Nigeria visa photo be?Typically 35 × 45 mm for printed photos or 600 × 800 pixels for digital images. Can I use a 2 × 2-inch photo?Only if your application specifically asks for it. What background is required?A plain white background with no shadows or objects. Can I smile?A neutral expression is recommended. Can I wear glasses?It’s better to remove them, but if you wear them, your eyes must be clearly visible. Can I take the photo myself?Yes, but it’s best to have someone else take it or use a tripod. Why was my photo rejected?Usually due to incorrect size, poor lighting, background issues or unclear facial features. |
|
| Source | https://www.nigeriaembassyusa.org/ |