Australia Visa Photo Maker
35x45 mm (3.5x4.5 cm) Size and Requirements


| Country | Australia |
| Document type | Visa |
| Passport picture size | Width: 35 mm, Height: 45 mm |
| Resolution (DPI) | 600 |
| Image definition parameters | Head must be between 70 to 80 % of the photograph from the bottom of the chin to the top of the head |
| Background color | White |
| Printable photo | Yes |
| Digital photo for online submission | Yes |
| Digital photo size | Width: 826 pixels , Height: 1062 pixels |
| Photo Paper type | matte |
|
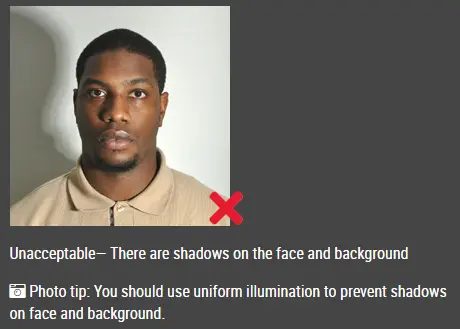
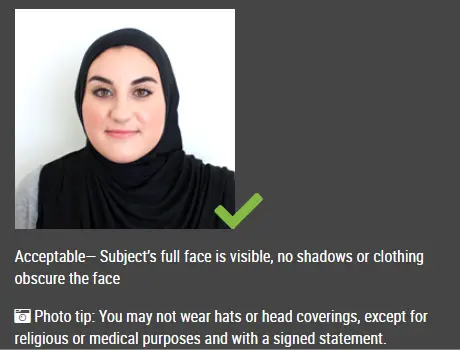
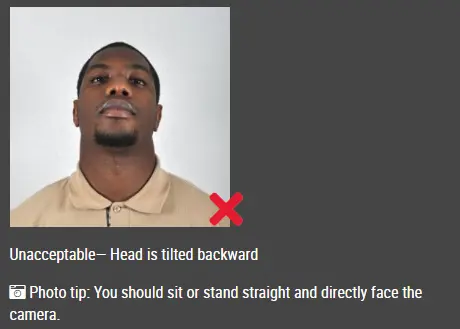
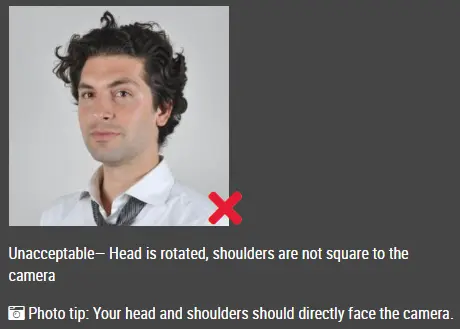
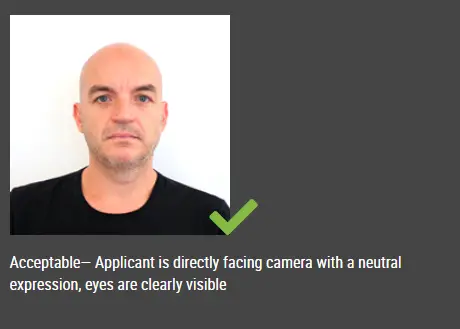
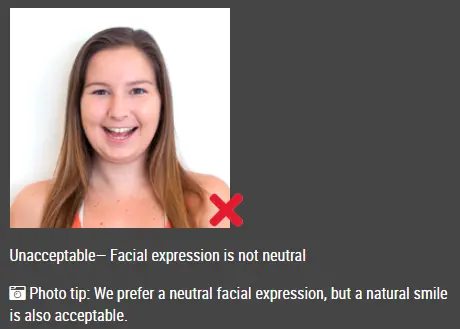
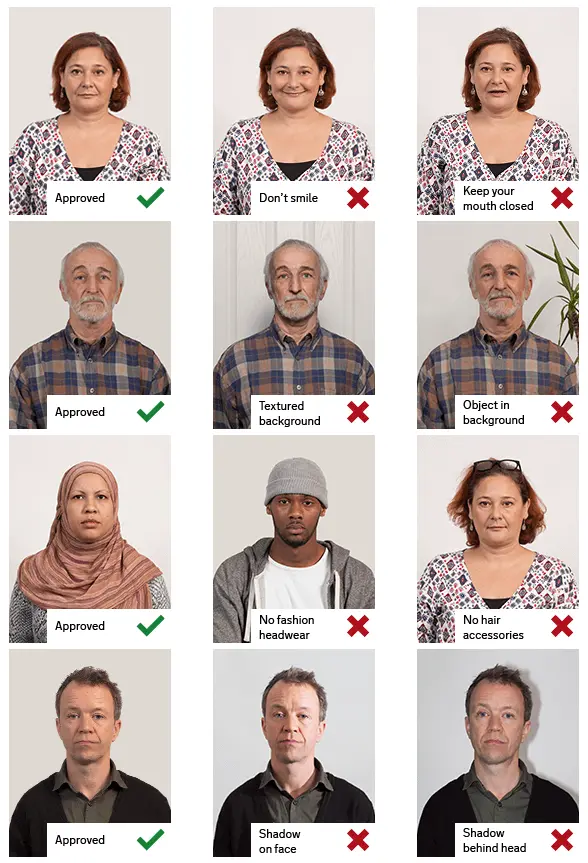
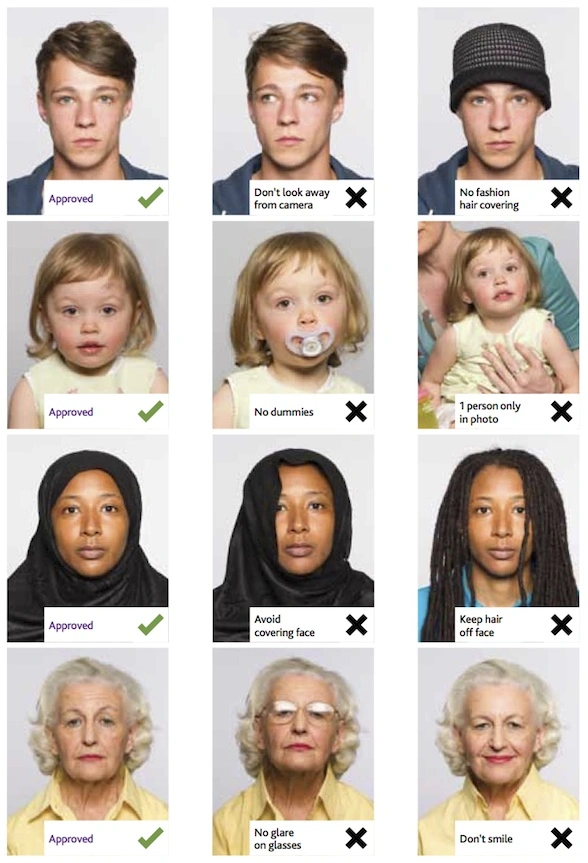
Detailed requirements Last Update: July 25, 2026 AUSTRALIA VISA PHOTO REQUIREMENTS Passport photo size: 35 mm wide × 45 mm high Photo age: Less than six months old Photo quality: Clear, in focus and in colour Photo view: Full face looking directly at the camera Background: Plain white or light grey Expression: Neutral expression with eyes open Lighting: Even lighting without shadows, glare or red-eye Head position: Straight and centred without tilting Glasses: Remove glasses where possible to avoid reflections or obstruction Head coverings: Permitted for religious reasons when the entire face remains visible Photo editing: Retouching or filters that change your appearance are not permitted Submission type: Digital upload or printed photo, depending on the visa subclass and application method Number of photos: Check the document checklist for your visa subclass Australian visa photo requirements are not identical for every visa. Follow the instructions in your ImmiAccount application, paper application form or official visa document checklist. HOW TO USE IDPHOTODIY TO CREATE AN AUSTRALIA VISA PHOTO ONLINE Step 1: Take a clear passport photo Use a smartphone or digital camera to take your passport size photo. For the best result, ask another person to take the picture so the camera remains level and your face is centred. Look directly at the camera and leave enough space around your head and shoulders for cropping. Step 2: Upload your photo to the passport photo maker Select the original image from your phone, tablet or computer. Avoid screenshots, scanned prints and heavily compressed images because they may reduce the photo quality. Step 3: Create your passport size photo online Use the IDPhotoDIY passport photo maker to crop and resize your image to 35 mm wide × 45 mm high. The passport photo maker will prepare both a printable template for printing and a single digital photo for online submission for your Australian visa application. Step 4: Download and submit your photo Save the completed passport photo to your device. Upload the digital image through ImmiAccount when your application requests a facial image, or print the required number of copies when completing a paper application. IMPORTANT: CHECK YOUR AUSTRALIAN VISA TYPE Australia has different photo submission processes for different visa types. Some paper visa applications require several printed passport size photos. Online applications may ask you to attach a digital facial image through ImmiAccount. The Australian Electronic Travel Authority application uses a different process. ETA applicants must take a live photo using the Australian ETA app. A previously prepared or uploaded passport photo cannot replace the live photo required by the app. Always check the instructions for your specific visa subclass before submitting your photo. FREQUENTLY ASKED QUESTIONS Can I create an Australia visa photo online? Yes. When your visa application accepts a digital or printed passport-style image, you can use the IDPhotoDIY passport photo maker to crop and prepare your photo online. Can I use a smartphone photo? Yes. A clear smartphone photo can be used as the original image when it has even lighting, a plain background and sufficient image quality. Can I take a selfie? A handheld selfie may distort your face or create an incorrect camera angle. Ask another person to take the photo or place your phone on a stable tripod. For an ETA application, follow the Australian ETA app instructions because the app requires a live facial image. Does every Australian visa use the same photo requirements? No. Requirements vary by visa subclass and application method. Check the document checklist displayed in your application. Do I need a digital or printed photo? Online applications may request a digital facial image. Some paper applications require printed photos. Use the submission method specified for your visa subclass. How many Australia visa photos do I need? The number depends on the visa type. Some paper visa subclasses request four recent passport-size photos, while online applications may request one digital facial image. Can I use filters or retouch my photo? Do not use beauty filters, skin smoothing, face reshaping or edits that change your natural appearance. Basic cropping and sizing are acceptable. Can I wear glasses? Remove glasses where possible. Reflections, tinted lenses or heavy frames can obscure the eyes and interfere with facial-image processing. Source: https://immi.homeaffairs.gov.au/citizenship/photo-requirements-for-citizenship-applications |
|
| Source | https://www.homeaffairs.gov.au/ |