US Passport photo in 3S!
Last Update: July 25, 2023
You need to submit one color passport photo when you apply or renew your passport. If you have taken a photo with your digital devices, our passport photo editor can generate passport photos that meet the requirements in 3 seconds!
Just follow the following three steps:
1. Select a country. The passport photo requirements vary from country to country/region to region. Once the country is selected, our system will retrieve the correct passport photo size from our database and apply it to the following steps.
2.Upload your photo. Photos should be smaller than 4000 x 3000 pixels and the file size should not exceed 10MB. The system processes only .jpg or .jpeg files. The uploading process may take a few seconds depending on the photo's file size and connection bandwidth.
3.Crop photo. You can use passport photo cropping tool to choose the region of the photo according to the passport photo requirement. As soon as a country is selected, a ratio of width to height is set. You can resize and move the region.
With these three steps, you will get a 4R sheet with six 2x2 passport photos and a single digital photo for online submission.
US Passport Photo Basic Requirements
-
You must submit a color photo taken within the past six months.
-
Make sure your face is clearly visible in the image.Social media filters should not be used.
-
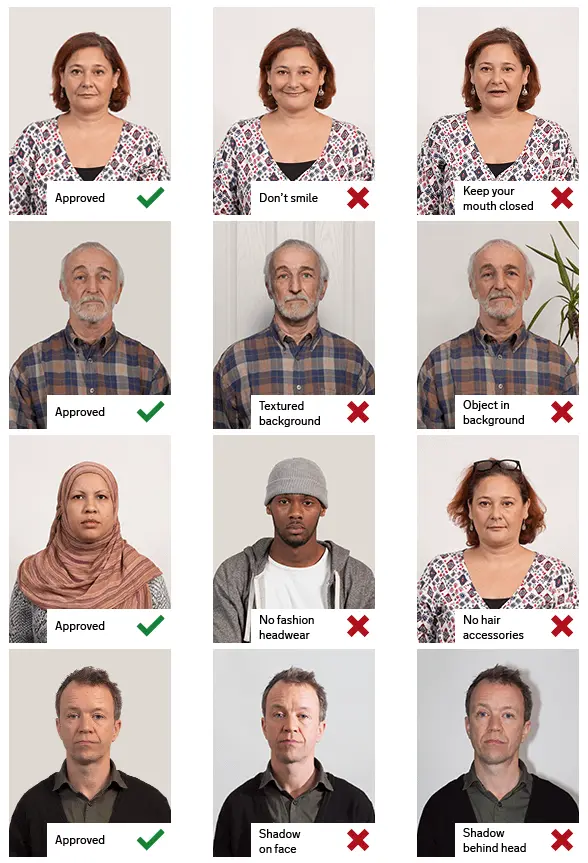
Ensure that the background is white or off-white without shadows,textures, or lines. (You don't have to worry about the background, our passport photo processor will automatically remove the background for you)
-
You will need to take your eyeglasses off for your picture.
-
You should have someone else take your photo. No selfies as selfie are often the wrong size and has the incorrect head position for a passport photo.
US passport photo resolution
- The passport photo must be in high resolution that is not blurry, grainy, or pixelated.
- Your photo must be at least 600 x 600 pixels.
US passport photo Size and Quality
- The correct size of a US passport photo is:
-
- 2 x 2 inches (51 x 51 mm)
-
Head must be between 1 -1 3/8 inches (25 - 35 mm) from the bottom of the chin to the top of the head
-
Photo paper that is glossy or matte.
-
Photographs should not be altered digitally.
-
If the photo has holes, creases, or smudges, you cannot submit it.
How to pose for US passport photo
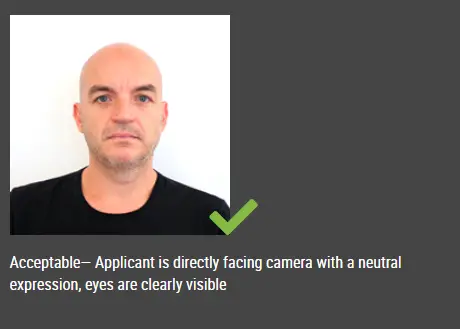
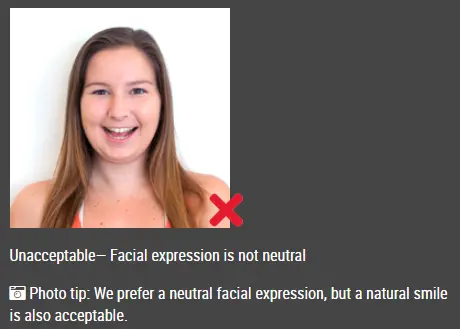
- Have a neutral facial expression with mouth closed and do not show your teeth
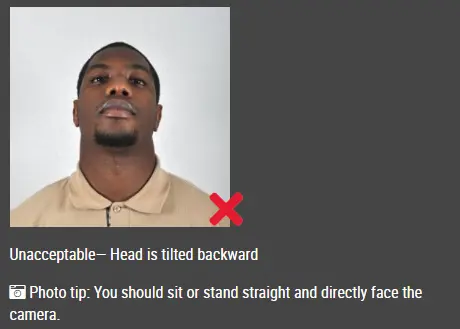
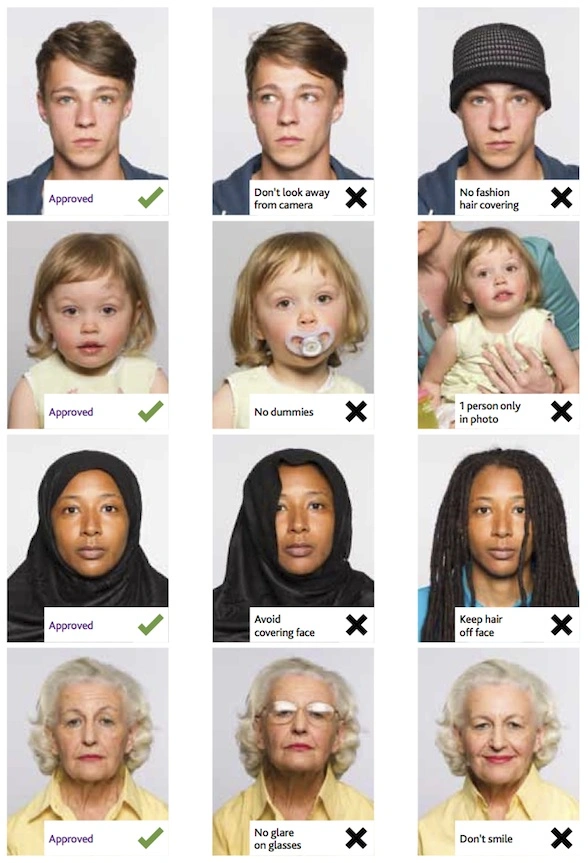
- Your head should be straight and your eyes should be open, with no hair covering your eyes or eyebrows
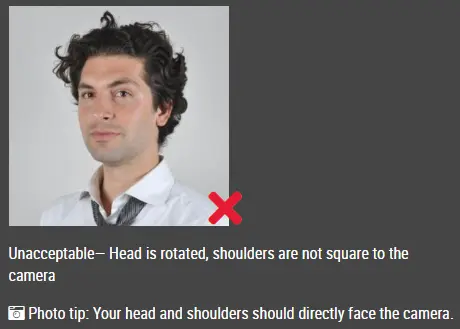
- Face the camera directly with full face in view and your head must not be tilted.
How to dress for the US passport photo
- It is taken in everyday clothing.
- Camouflage clothing, uniforms, and clothing that looks like uniforms are not allowed.
- You cannot wear glasses.
- Applicants who cannot remove their glasses for medical reasons must submit a signed letter from their doctor.
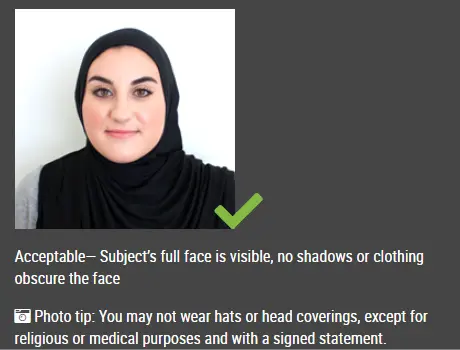
- Hats and head coverings are not permitted.
- Please submit a signed statement certifying that the hat or head covering in your photo is a traditional religious garment worn continuously.
- In the case of a hat or head cover worn for medical reasons, you must submit a signed statement from your physician verifying that the covering is used daily for medical reasons.
- Hats or head coverings cannot cast shadows or cover part of your face, and your full face should be visible.
- You cannot wear headphones or wireless hands-free devices.
- Wearing jewelry and maintaining facial piercings is fine as long as you do not cover your face.Permanent tattoos are acceptable for passport purposes as well.
Special Requirements for a US Digital Passport Photo
Format:
The photo must be in JPEG format.
Size:
You must upload a photo that is at least 54 kilobytes in size and no larger than 10 MB.
Dimensions:
Your photo should be at least 600 pixels high by 600 pixels wide.Whenever you ask a friend or family member to take your passport photo, make sure that the image has ample space around your head and torso so that the passport photo cropping tool can crop it properly.The dimensions can be rectangular.
Color:
Make sure your photo is in color (24 bits per pixel), which is the standard output for most digital cameras.
Compression:
The compression ratio of your photo should be less than or equal to 20:1.To maintain the clarity and resolution of your photos, use the highest quality settings on your camera.Select the highest quality setting when saving and emailing your photo (large file size).
Can I wear face coverings and masks for my US passport photo?
You must remove your face covering or mask before taking your passport photo so that your full face can be seen. Identifying you requires a full view of your face.
How to take a perfect US passport photo at home
Submitting a passport photo that adheres to the guidelines is crucial as a photo rejection would set your application back.
Here are some tips on taking a perfect US passport photo:
-
No selfies even with a selfie stick as selfies are often the wrong size and has the incorrect head position for a passport photo.
-
Lighting
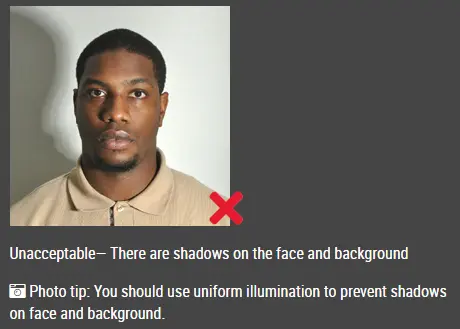
- The best light is natural light, as artificial light casts shadows under your eyes and nose.
- You mya use a white board to reflect light onto the dark side.
- It is best to take your photo during the daytime, when there is sufficient light.
- Shooting outdoors in strong sunlight will make you squint. For a natural look, use window lighting.
- The look
- Wear everyday clothing
- You may wear make-up if you want, but don't overdo it.
- Your fringe should not cover your face , and shoulders and hair must not be cropped off .
- take off your glasses and hats
- You should look straight ahead with a neutral expression and do not your teeth.
- The distance between the subject should be neither too close nor too far
- Stand still
- Keep your hands down
Klicken Sie hier, um Passfotos / Visafotos zu erstellen